Forget about the opinionated “Tabs versus Spaces” discussions, the reality is, while dealing with different programming languages and different operating systems’ configuration files, you might be aware of what is standard for that specific file or language’s indentation, otherwise, your file/code will be broken.
Some languages like the Go Programming Language require Tab for indentation, and you probably won’t care too much about it because the gofmt tool will scan your code and format it properly applying Tabs where it is needed.
That’s not always the case! You may be working with a configuration file that requires Tabs, therefore you should know how to make deliberate use of Tabs and Spaces in Vim, and how to visualize it.
Visualizing Tabs
It will be presented two ways to visualize Tabs in Vim.
Searching for the Tab Character
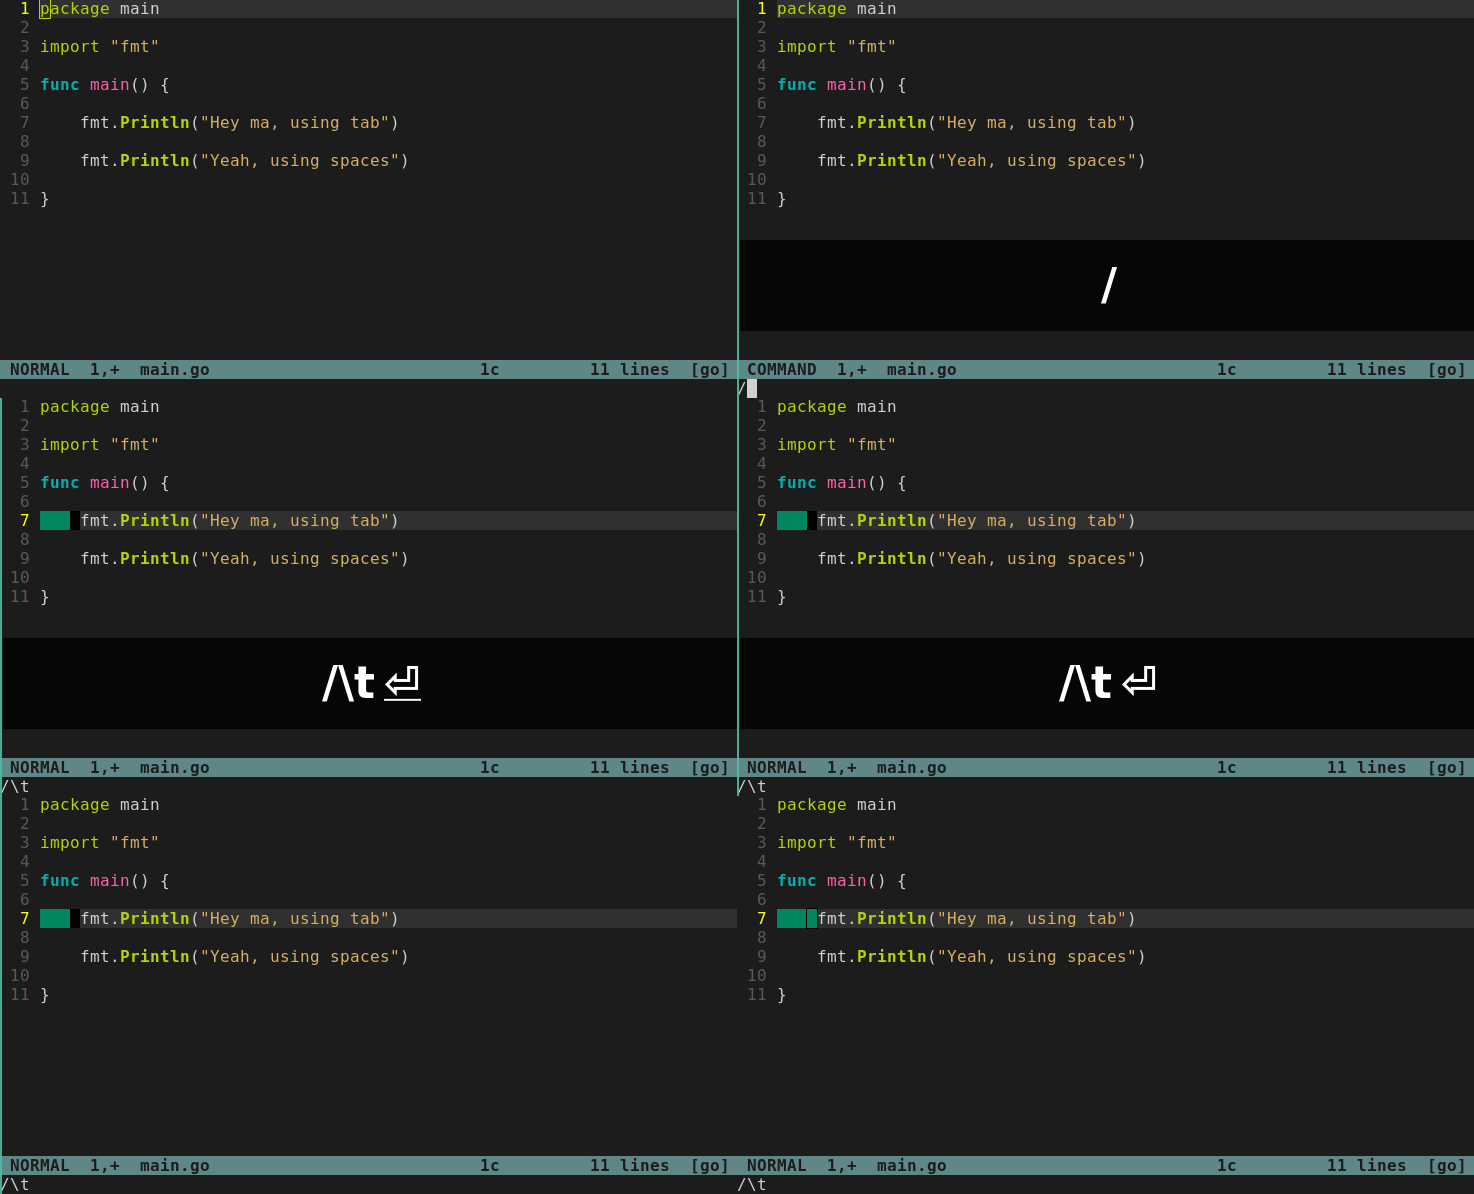
A quick way to visualize whether there is a Tab character is by searching for it using Vim’s search-commands:
- In
NORMALmode, type/\tand hit<Enter>. It will search for the Tab character (\t) and highlight the results.
Although it may be good for a quick check, if you need persistent Tabs visibility plus the ability to use the search-commands for other purposes, you might need another solution.
Activating list Mode
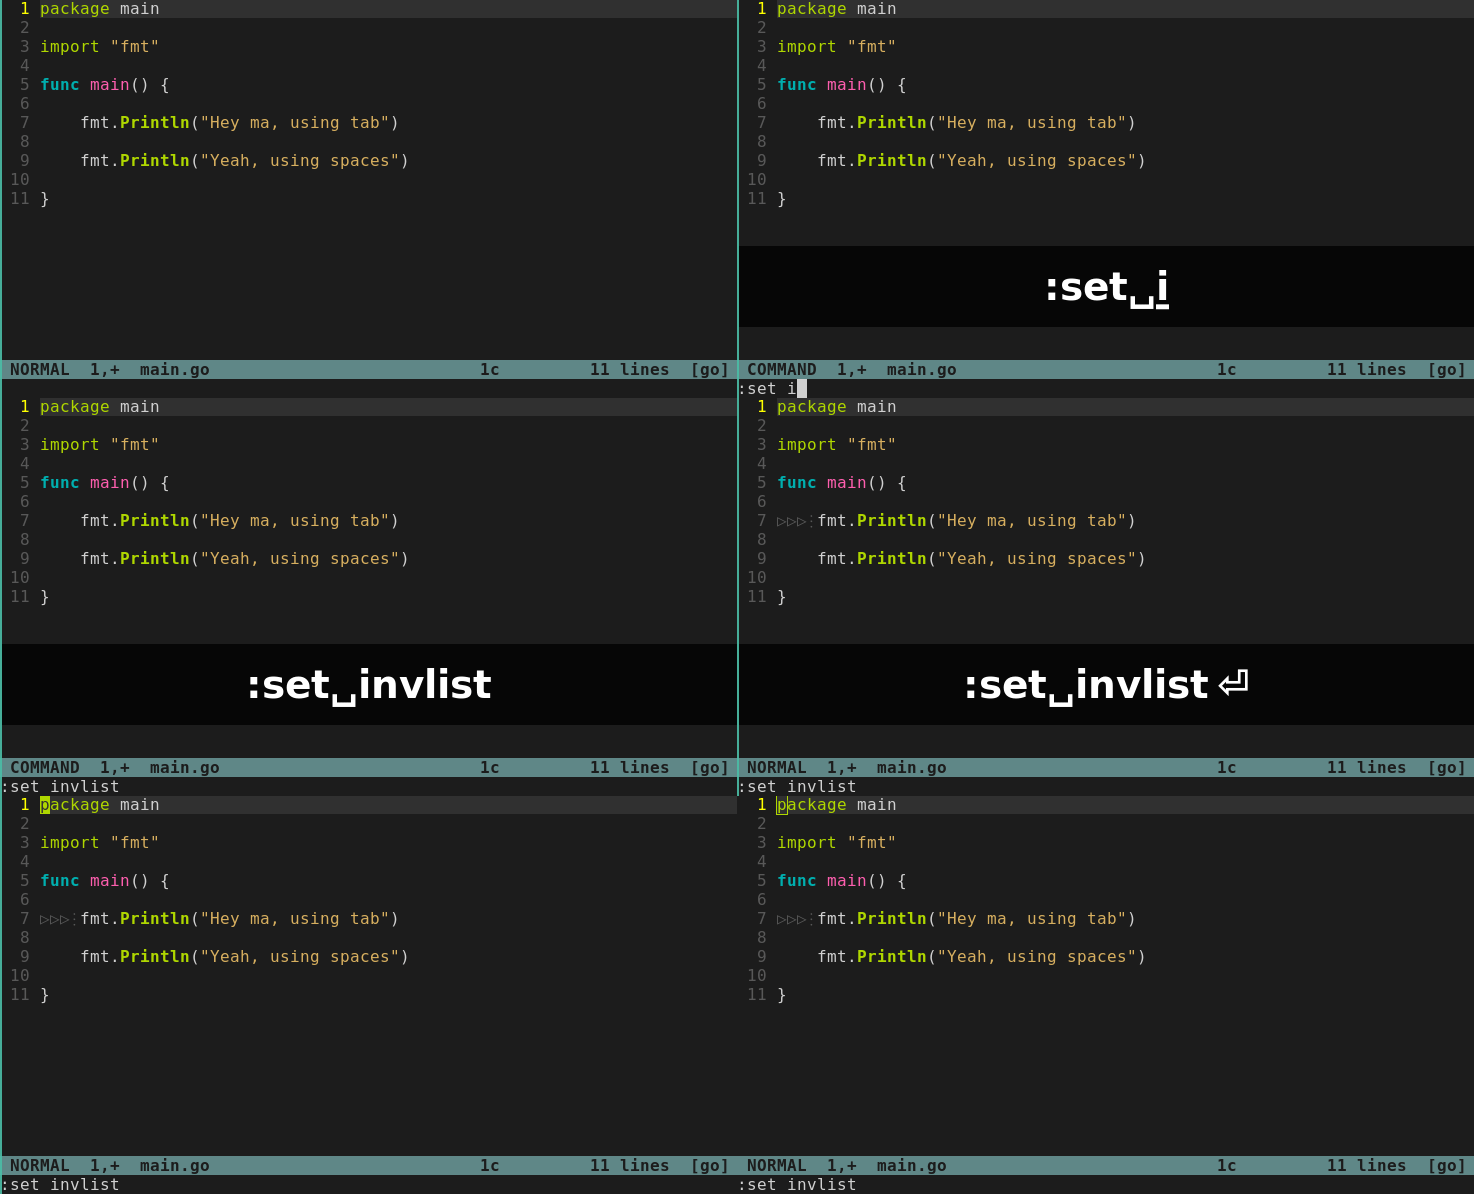
Vim’s list mode displays on screen unprintable characters (<Tab>, EOF, EOL, etc…) with strings defined by the listchars option.
By default, it will display ^I for a Tab character but this default representation breaks screen alignment so, the suggestion is to set a string representation to be used for the Tab character:
- In
NORMALmode, type:set listchars=tab:▷▷⋮or addset listchars=tab:▷▷⋮to your.vimrcfile.
The command above defines the strings that Vim will display (▷▷⋮) for a Tab character. Vim’s behavior is to repeat or omit the second character (▷), which means:
A Tab character on a file that the indentation is set to occupy two screen spaces, will display ▷⋮.
A Tab character on a file that the indentation is set to occupy four screen spaces, will display ▷▷▷⋮.
(Special thanks to @p4tpr0 for testing and pointing out that if using Vim versions older than 8.2 you may encounter issues assigning 3 characters, and you’d be safe using 2 characters, for example ▷⋮.)
- Toggle
listmode by typing:set invlistinNORMALmode.
Extra: Create a Mapping to Toggle list Mode Quickly
Add the following line to your .vimrc file:
noremap <Leader><Tab><Tab> :set invlist<CR>
(You may substitute <Leader><Tab><Tab> as you wish. If you’d like to know more about Vim mappings, please check this post.)
Applying Tabs
It is very likely that your .vimrc file has the configurations presented below:
set tabstop=4 "(or =2)
set expandtab
Those are widely recommended in public .vimrc files and blog posts shared by users, therefore it is very likely you set this up when you started using Vim.
Let’s recap what these configurations imply:
set tabstop=4: tells Vim to display 4 spaces on the screen wherever there is a Tab character.set expandtab: tells Vim to insert 4 spaces instead of a Tab character when user press<Tab>oninsertmode.
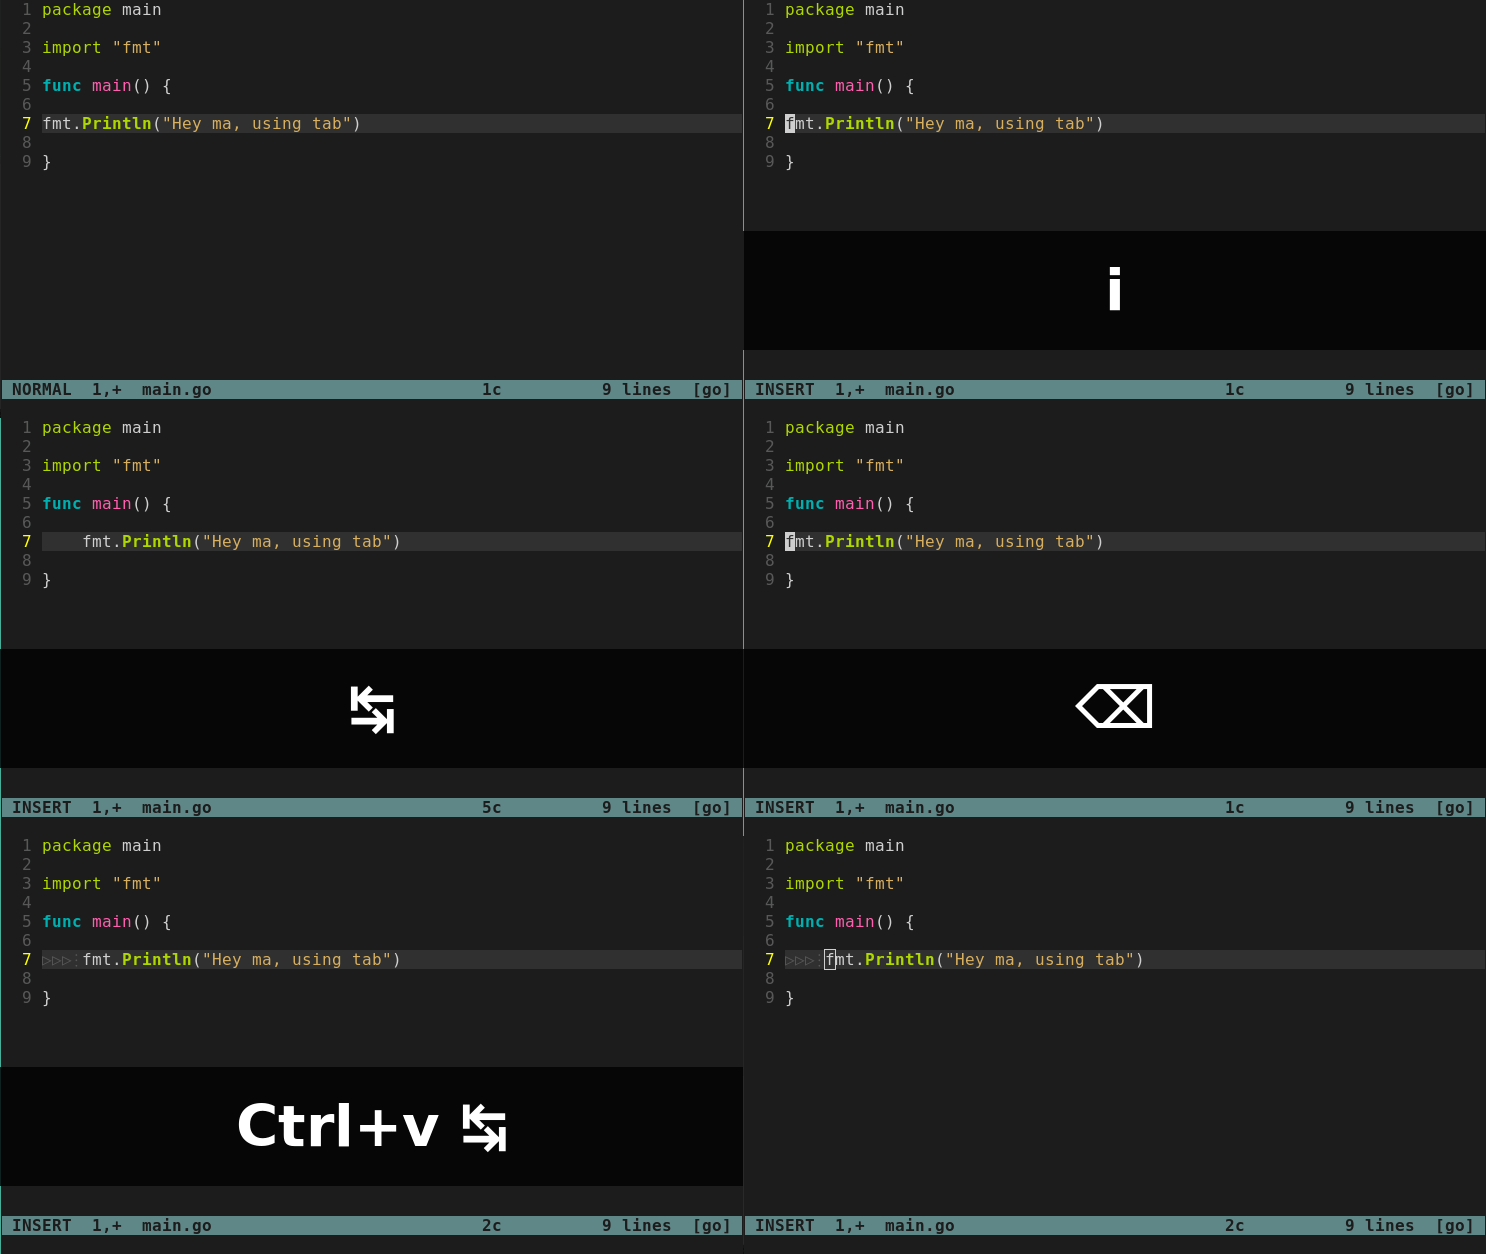
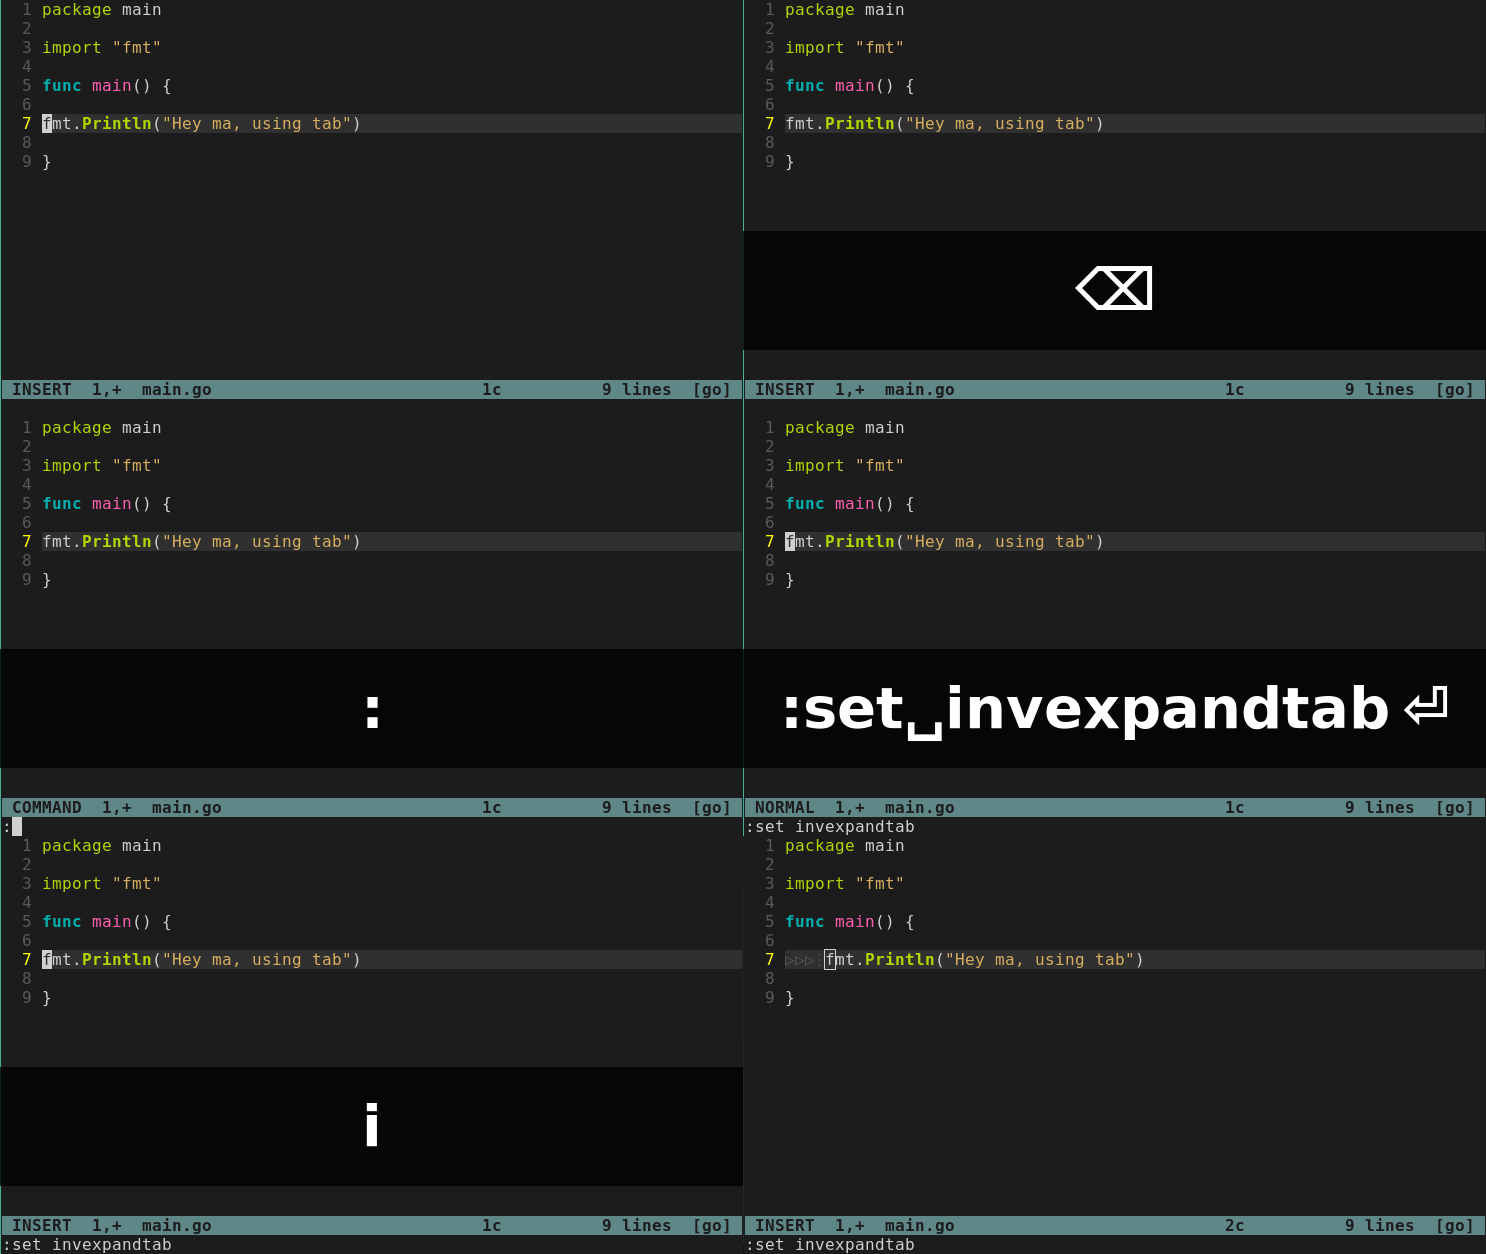
With both configurations in place, Vim will be using spaces anytime you hit <Tab> so, if you need to insert a real Tab character you may:
- On
INSERTmode press<Ctrl>+v+<Tab>.
(<Ctrl> + v signals Vim that it should take the next character literally.)
- Run the command
:set invexpandtabto toggleexpandtabbehavior.
(The setting will last until Vim exits or the toggle be triggered again.)
You Found Peace on The Tabs x Spaces War!
Now you are good to go with a setup and skills that give you no chance of losing your precious time debugging something just to find out you weren’t applying real Tabs.
Useful links & references:
- Vim Documentation (
:help) - How can I insert a real tab character in Vim?
- Displaying tabs as characters
- Understand Vim Mappings and Create Your Own Shortcuts!
- “Mastering Vim Quickly” Book (and screencasts) by Jovica Ilic. It’s an awesome book, make sure you subscribe to the newsletter to get free Vim tips and book excerpts on your email.
(👆 This is an affiliate link. If you got any value from this post and are also interested in buying the MVQ book/screencasts, please consider visiting the affiliate link and you’ll be gifting me a coffee ☕ or a beer 🍺.)
Footnotes:
- Follow me on Twitter to get more posts like this and other quick tips in your feed.
- alldrops.info is the TRUE and FOREVER FREE home for the previously used medium.com/vim-drops publication. At alldrops.info you’ll always find all posts without Medium.com restrictions.
- If you have any doubts or tips about this article, I’d appreciate knowing and discussing it via email.
- Do you have any other Vim tips? Would you like to publish that in this blog? Please send an email to vim drops.
- As English is not my native language, I apologize for the errors. Corrections are welcome.
- Contact: vim [@] alldrops [.] info.

