When you start using vim you quickly find yourself searching for some small improvements on your keyboard commands. Maybe you want the <Esc> functionality a little bit closer to your fingers, or maybe you’d like to create a shortcut for a command sequence that you use very often.
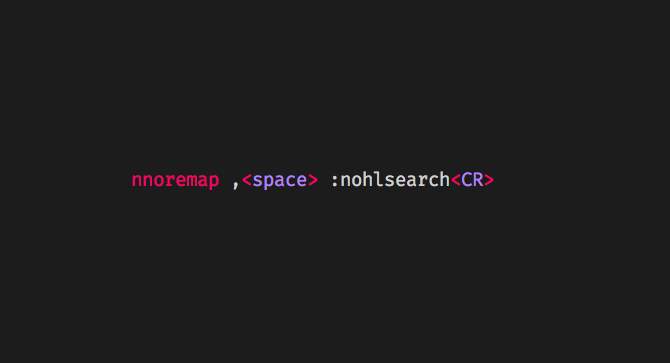
There are good chances that you’ve checked stackoverflow looking for the easiest way to clear last search highlighting and found out that you need to type the command :nohlsearch or :noh, and then reading more, you get some tips about including a mapping (a shortcut!) on your .vimrc file, to have the shortcut ,<space> always under your fingers.
When ,<space> is pressed, the search highlighting is cleared.
(from :help mapping…)
Key mapping is used to change the meaning of typed keys. The most common use is to define a sequence of commands for a function key.
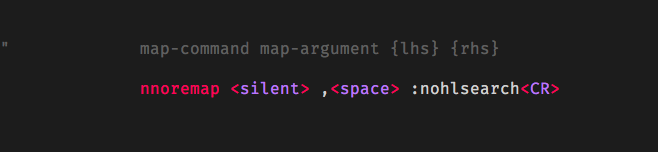
It’s kinda easy to get going, to read the mapping that you’ve just pasted nnoremap ,<space> :nohlsearch<CR> and try to change it to something else… It’s fun to play a little bit and to figure it out by yourself, and you should do it, but mapping is something very present on vim, and it’s important to understand it.
As almost every single feature on vim, mapping is very powerful and it has tons of options and functionalities that handle many use cases but, as you might expect, on this post I’ll try to expose the big picture of mapping, giving you a simple and clear understanding, bringing you the confidence to create your own mappings from scratch.
Understanding the key mapping structure
The structure is simple:

…and it’s possible to use the special arguments:
map-arguments (one or more) are optional.
Exploring the structure:
| map-command |
It’s the first thing and, implicitly, the map-command defines:
- whether you’re adding new/removing/listing map
- whether the mapping will be recursive/non recursive
- the mode where the mapping will be applied
From the example:
nnoremap defines that this is adding a new mapping to be apllied in NORMAL mode and it’s non recursive .
| map-arguments |
It’s optional and it must appear right after the map-command, you can use one or more arguments combined, and they can be used in any order.
From the example:
<silent> defines that when you execute this mapping pressing ,<space> , the command :nohlsearch will not be echoed on the command line.
| {lhs} left-hand-side |
That’s where you define the shortcut or the key(s) you’re gonna use. It can be a single key like , or a sequence of keys like ,<space>.
From the example:
,<space> is the shortcut, it’s the sequence of keys that calls what you defined on {rhs}.
| {rhs} right-hand-side |
That’s where you define what will your shortcut replace/execute when you press the key(s) defined at {lhs}. It can replace a key or execute a sequence of keys, it can call vim native commands (like previous example) or functions you created on vimscript language, things can be as complex as you wish.
From the example:
:nohlsearch<CR> is what will be executed, vim will type :nohlsearch followed by the <Enter> key that is defined by <CR>.
Now… all together!

… basically tells vim:
Everytime I press
,then<Space>inNORMALmode, please type the following command:nohlsearchand please finish with<Enter>(_<CR>_) to execute the command. But…hey! Attention! I don’t want the command to be echoed on command line!… and there’s more…I don’t want it to be recursive so, if I’m saving another key mapping in the future and I write the sequence,<space>on the{rhs}, it’s not supposed to call_:nohlsearch_again, it’s supposed to refer to the original behavior of the,then<space>keys.
When , is pressed the search highlighting is cleared but the command is not echoing on the command line.
Understanding the main commands and arguments.
Now that you’re more confortable with the structure, let’s explore a little bit more of the main commands and arguments that you can use.
We’ll just take a superficial look at them to open our head to the possibilities but, keep in mind that to have a solid understanding you’ll need to take some time to play and test it out.
Map Commands
As mentioned before, there there are commands to add, remove and list mappings, they can be recursive or not, and they work in different modes.
The main commands:

Take a minute to stare at it and the syntax will start to make sense.
At the first column you’ll notice it’s written (or list), it’s because the same command if used alone will list the mappings existent for that specific mode.
Special Arguments
The special arguments can be used in any order, but they must appear right after the map command, before any other arguments.
They are:
<buffer>
Keep the mapping restricted to work only on the current buffer where the command is being executed. It allows you to use the same key(s) with a different mapping on another buffer.
This argument can also be used with the command to remove a mapping from the current buffer.
<nowait>
It basically tells vim if you type the characters defined the {lhs}, vim must not wait for any more characters to be typed and it must execute this mapping right away!
It’s important to know that if you do type more characters, it will be used and thrown after the mapping execution.
<silent>
As shown before, it prevents the mapping to be echoed on the command line.
<special>
It’s used to indicate that you’ll use the <> notation to define a mapping for special keys (example :map <special> <F12> /Header<CR> )
<script>
We’re not going too deep on this one, you’ll probably do that when you start to create your own plugins and scripts. Basically It’s used to avoid interferences on mappings that are present on scripts.
<expr>
It defines that the {lhs} will be an expression, and this expression will be evaluated to obtain the {rhs}.
<unique>
Used to avoid overwriting a mapping that already exists for that specific key(s).
Now you know most of the basics that will improve your mapping skills but, if you hit some unexpected behaviour or if you feel that some mapping doesn’t look that good, take an hour to read
:help mappingand try the examples, there’s a few more magics!
Attention! Some advices before you start creating your own mappings:
- It makes sense to create your mappings and save it on your
.vimrcfile to have it always on hands. - It’s recommended to always use non recursive mappings, unless there’s this special case where you need the recursive behavior.
- Vim has commands for almost every key so, when creating mappings, you must make good choices. Avoid changing the behavior of vim’s most important keys/commands. Get the best orientation at
:help map-which-keys. - If you need some help about how to use some specific keys at
{lhs}or{rhs}, check:help key-notationand:help map-special-chars. - Improve your workflow but don’t exaggerate! First, create mappings only for commands that are slowing your workflow, or for that key you need very often and it’s hard to reach on your keyboard model. After being more used to it, or when you start to create some vim scripts and plugins, you’ll probably dive a little bit deeper on mappings.
Useful links & references:
- Vim Documentation (
:help) - You can practice mappings from the very easiest ones to more complex ones, following the exercices on chapters 3, 4, 5 and 6 from the free ebook “Learn Vimscript the Hard Way", (by Steve Losh).
- “Mastering Vim Quickly” Book (and screencasts) by Jovica Ilic. It’s an awesome book, make sure you subscribe to the newsletter to get free Vim tips and book excerpts on your email.
(👆 This is an affiliate link. If you got any value from this post and are also interested in buying the MVQ book/screencasts, please consider visiting the affiliate link and you’ll be gifting me a coffee ☕ or a beer 🍺.)
Footnotes:
- Follow me on Twitter to get more posts like this and other quick tips in your feed.
- alldrops.info is the TRUE and FOREVER FREE home for the previously used medium.com/vim-drops publication. At alldrops.info you’ll always find all posts without Medium.com restrictions.
- If you have any doubts or tips about this article, I’d appreciate knowing and discussing it via email.
- Do you have any other Vim tips? Would you like to publish that in this blog? Please send an email to vim drops.
- As English is not my native language, I apologize for the errors. Corrections are welcome.
- Contact: vim [@] alldrops [.] info.