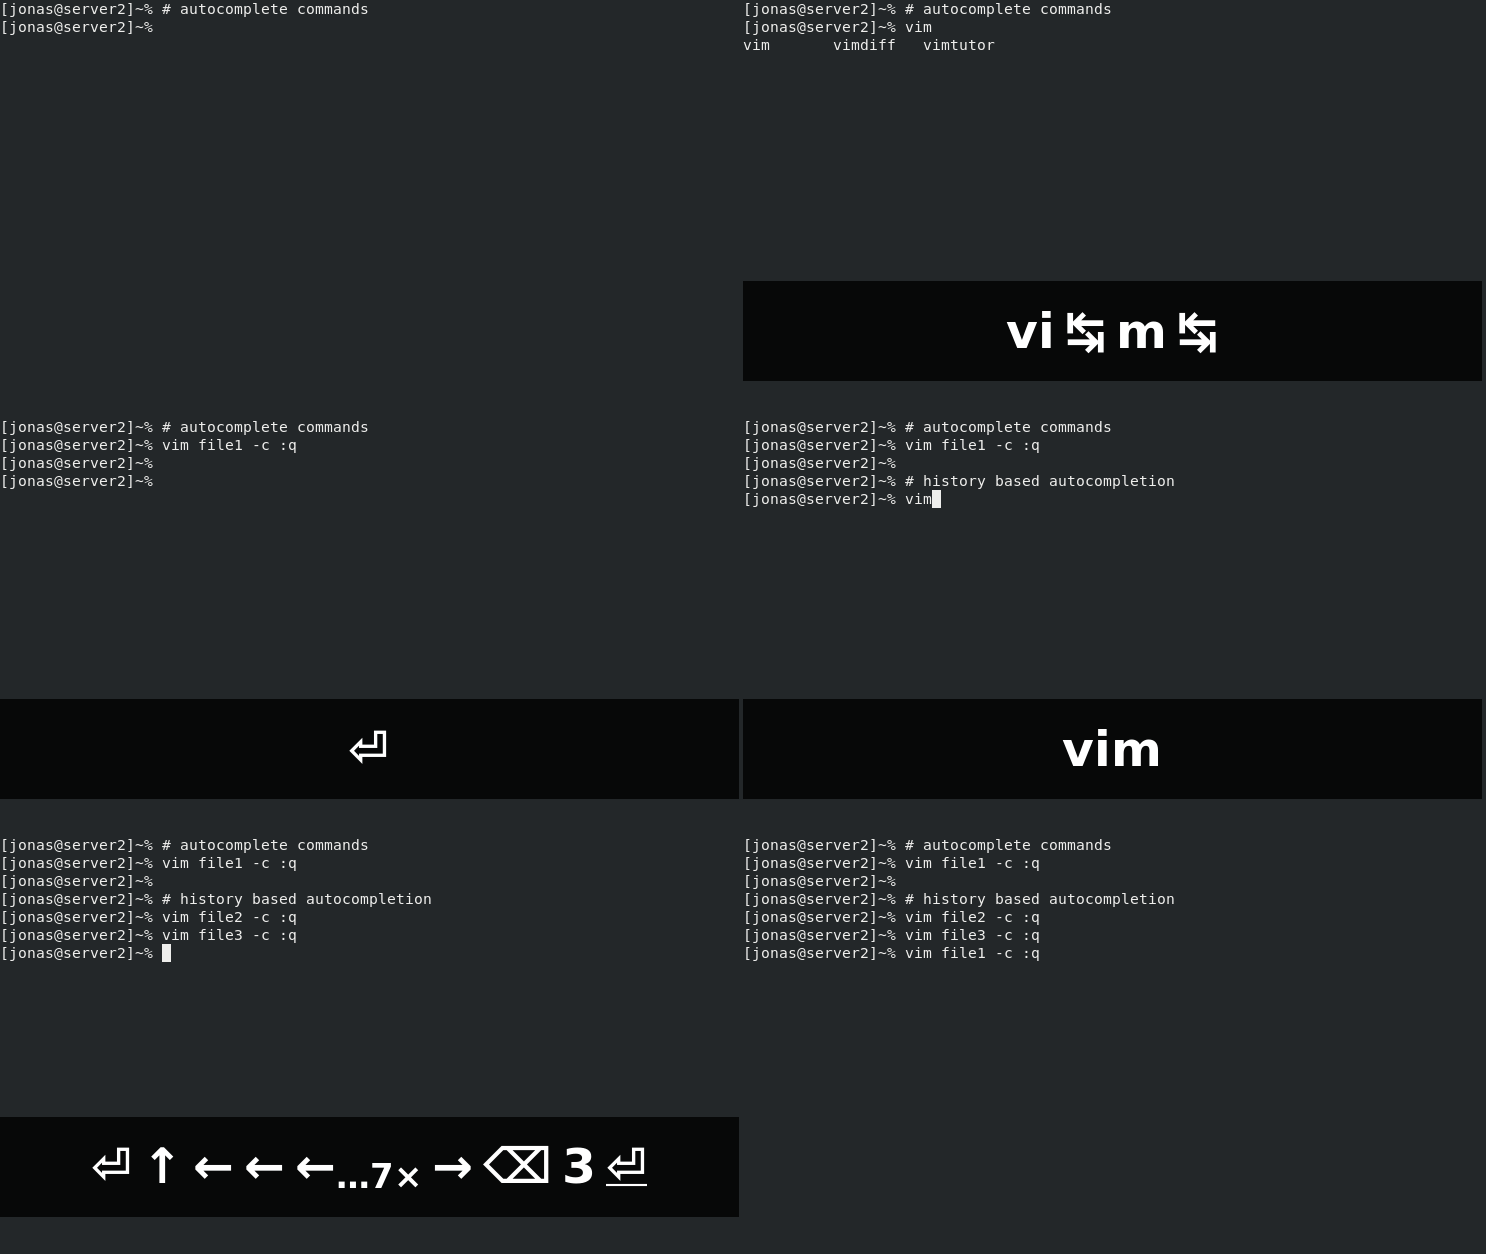
Yes, Oh My Zsh is awesome! That’s the first thing I installed when I switched from Bash to Zsh and I used it for a few years.
Past that time, I realized that in my daily use, the only features I was taking advantage was:
Autocompletion and history-based autocompletion using the arrow keys.
The fancy multi-line and colorful user prompt showing the working directory, and the switching color after the fail/success of the previous command execution.
The git repository info at the user prompt.
The
zcommand, provided by the ZSH-z plugin.
I couldn’t help myself but thinking that the Oh My Zsh framework was much more than I needed. I decided to remove Oh My Zsh and reset Zsh from scratch, so I could configure and install only the features I needed.
This is a four-part post series explaining how to set up those features on a fresh new Zsh installation:
Customize Zsh Pt.1 - Autocompletion 👈
Customize Zsh Pt.2 - User Prompt
Customize Zsh Pt.4 - ZSH-z Plugin
Autocompletion
Zsh has a powerful completion system built-in by default. You need to load and initialize to take advantage of it. There is a lot to learn about it if you feel like going deeper but this post’s objectives are:
To enable the standard autocompletion.
To set up history-based autocompletion.
How to Set Up
After a Zsh fresh install it runs a helper for the first time you log into the shell:
This is the Z Shell configuration function for new users,
zsh-newuser-install.
You are seeing this message because you have no zsh startup files
(the files .zshenv, .zprofile, .zshrc, .zlogin in the directory
~).  This function can help you with a few settings that should
make your use of the shell easier.

You can:

(q)  Quit and do nothing.  The function will be run again next time.

(0)  Exit, creating the file ~/.zshrc containing just a comment.
     That will prevent this function being run again.

(1)  Continue to the main menu.

--- Type one of the keys in parentheses ---
Avoid using the helper and apply the settings inside the .zshrc file, so:
Type
0to exit the Zsh helper creating a blank.zshrcfile in your$HOMEdirectory.To load and initialize the Zsh completion system, open the
.zshrcfile in your code editor and add the following line at the top of the file:# AUTOCOMPLETION # initialize autocompletion autoload -U compinit && compinit(Learn more:
man zshcompsysand go toUse of compinit)To allow history-based autocompletion, first, apply some configurations to improve Zsh’s history management by adding the following lines to the
.zshrcfile:# history setup setopt SHARE_HISTORY HISTFILE=$HOME/.zhistory SAVEHIST=1000 HISTSIZE=999 setopt HIST_EXPIRE_DUPS_FIRST(Read options and parameters descriptions:
man zshoptionsandman zshparam)With Zsh history set, create key bindings to use up and down arrow keys to navigate history for the provided command:
# autocompletion using arrow keys (based on history) bindkey '\e[A' history-search-backward bindkey '\e[B' history-search-forwardThe code above assumes that
[Ais the value your terminal emulator sends for the keyboard up arrow, and that[Bis the value for the keyboard down arrow.You can double check by pressing
<Ctrl>+vand<up-arrow>in your Zsh prompt, see more here.(Learn more:
man zshzleand go toZLE BUILTINSfor key bindings, and go tohistory-search-.)Source the
.zshrcfile again, in the Zsh shell type:source ~/.zshrc
Autocompletion is ready to go!
The final .zshrc file must look like this:
# AUTOCOMPLETION
# initialize autocompletion
autoload -U compinit
compinit
# history setup
setopt SHARE_HISTORY
HISTFILE=$HOME/.zhistory
SAVEHIST=1000
HISTSIZE=999
setopt HIST_EXPIRE_DUPS_FIRST
# autocompletion using arrow keys (based on history)
bindkey '\e[A' history-search-backward
bindkey '\e[B' history-search-forward
# GENERAL
# (bonus: Disable sound errors in Zsh)
# never beep
setopt NO_BEEP
With those simple steps autocompletion is ready and your Zsh shell is becoming more powerful.
Part 2 explores how to apply a simple configuration to improve the user prompt.
Next:
Customize Zsh Pt.2 - User Prompt
Useful links & references:
- Zsh Documentation (
man -k zshto list each Zsh man page section) - key bindings table?
- A Guide to the Zsh Completion With Examples
Footnotes:
Follow me on Twitter to get more posts like this and other quick tips in your feed.
If you have any doubts or tips about this article, I’d appreciate knowing and discussing it via email.
Do you have any other Cli tips? Would you like to publish that in this blog? Please send an email to cli drops.
As English is not my native language, I apologize for the errors. Corrections are welcome.
Contact: cli [@] alldrops [.] info.
Big thanks 🙌 to Eric Nielsen for pointing out some improvements in Zsh history settings.


