
This guide shows how to perform a Headless Installation of Alpine Linux 3.14 64bit on a Raspberry Pi 4 B with Persistent Storage, using a Linux Workstation.
The term Headless Installation means that the Raspberry Pi will be only accessed via Network (ssh) since the first boot, and Persistent Storage means that will be set up a second partition to persistently hold the user files and the data generated by the services the Raspberry Pi may serve.
The system will be installed as Diskless Mode and any changes to the system will be saved using the Alpine Local Backup.
You don’t need to be a experienced Linux user to follow this guide! It is just required that you are a curious person with basic command-line interface skills such as, to execute commands with sudo privileges and editing text files.
Requirements:
A 15.3W USB-C power supply (official or similar).
A Class 10 MicroSD card of 16GB or more.
A computer running Linux and
sudoprivileges.Cable or WiFi internet connection allowing the Raspberry Pi and the Linux computer to be connected to the same network.
Create a Bootable MicroSD Card With Two Partitions
The goal is to have a MicroSD card containing two partitions:
The system partition: A fat32 partition, with boot and lba flags, on a small part of the MicroSD card, enough to store the system and the applications (suggested 256MB to 2GB).
The storage partition: A ext4 partition occupying the rest of the MicroSD card capacity, to use as persistent storage for the users and for the data generated by the services the Raspberry Pi may serve.
Identify the MicroSD card
Do not plug it into your computer and run the command:
lsblkTake note of the output, plug the MicroSD card into your computer and run
lsblkagain. Sample output:NAME MAJ:MIN RM SIZE RO TYPE MOUNTPOINT sda 8:0 0 223,6G 0 disk ├─sda1 8:1 0 600M 0 part /boot/efi ├─sda2 8:2 0 1G 0 part /boot └─sda3 8:3 0 222G 0 part /home sdb 8:16 0 465,8G 0 disk └─sdb1 8:17 0 465,8G 0 part sdc 8:32 0 465,8G 0 disk └─sdc1 8:33 0 465,8G 0 part sdd 8:48 1 59,5G 0 disk └─sdd1 8:49 1 59,5G 0 part /run/media/rossijonas/67E7-60D4 zram0 252:0 0 4G 0 disk [SWAP]Notice that
sddis the 64gb MicroSD card (in this case), and it has one partionsdd1mounted.From now on, you may copy/paste the commands, but remember to replace
sddwith the MicroSD disk name identified on your machine.
Cleanup
Unmount the partition(s):
sudo umount /dev/sdd1or
sudo umount /dev/sdd?*(If the device has more than one partition mounted.)Remove the partition(s):
sudo parted /dev/sdd rm 1(Repeat that for other existent partitions if needed, replacing
1with the partition number.)Erase filesystem/partition-table signatures:
sudo wipefs -af /dev/sddVerify that the device has no label applied and an empty partition table:
sudo parted /dev/sdd printSample output:
Error: /dev/sdd: unrecognised disk label
Model: Generic STORAGE DEVICE (scsi)
Disk /dev/sdd: 63,9GB
Sector size (logical/physical): 512B/512B
Partition Table: unknown
Disk Flags:
Create the Desired Partitions
Create MBR partitioning scheme on the MicroSD card:
sudo parted /dev/sdd mklabel msdos(You may run
sudo parted /dev/sdd printanytime to observe the changes applied.)Create the system partition (2GB):
sudo parted /dev/sdd mkpart primary 1 2gAdd
bootandlbaflags to the system’s partition:sudo parted /dev/sdd set 1 boot onsudo parted /dev/sdd set 1 lba onCreate the storage partition (62GB):
sudo parted /dev/sdd mkpart primary 2001 64g(Replace
64gwith the size of your MicroSD card, ex.:16g.)Build a
fat32filesystem on partition1and anext4filesystem on partition2:sudo mkfs.vfat -F 32 /dev/sdd1sudo mkfs.ext4 /dev/sdd2Verify the MicroSD card’s state with
sudo parted /dev/sdd printagain, it should end up with a scheme like this:Model: Generic STORAGE DEVICE (scsi) Disk /dev/sdd: 63,9GB Sector size (logical/physical): 512B/512B Partition Table: msdos Disk Flags: Number Start End Size Type File system Flags 1 1049kB 2000MB 1999MB primary fat32 boot, lba 2 2001MB 63,9GB 61,9GB primary ext4
Flash Alpine Linux Into the MicroSD Card
Download Alpine Linux for Raspberry Pi (
aarch64for Raspberry Pi 4 B).Eject and remove the MicroSD, and then plug it on again.
Run
lsblkto verify both partition mount points.Sample output:
sdd      8:48   1  59,5G  0 disk
├─sdd1   8:49   1   476M  0 part /run/media/rossijonas/4F85-22E7
└─sdd2   8:50   1  59,1G  0 part /run/media/rossijonas/6a9f9b14-628b-431f-9f3c-721d526
Extract the tarball into the system’s (bootable
fat322GB) partition:cd /run/media/rossijonas/4F85-22E7tar -zxvf ~/Downloads/alpine-rpi-3.14.0-aarch64.tar.gz(Substitute directories and filenames.)
Since it will be a headless install (without an external monitor plugged in) you can setup minimum memory usage for the GPU, maximizing available memory, via a user custom configuration file:
(Make sure you’re still on the same working directory as the previous command. Check with
pwd.)echo "gpu_mem=32" > usercfg.txt
Set Up for the Headless Installation
To perform a Headless Installation it is required to have an overlay file on the root of the bootable partition, containing some predefined networking configuration that will allow the Raspberry Pi to connect and to be accessible on the local network.
Verify the Local Network Settings, and Identify an Available IP Number
Install
nmapfrom the package manager:RHEL/CentOS/Fedora/RockyLinux -
sudo dnf install nmapUbuntu/Mint/Kali/Debian(or other Debian-based) -
sudo apt install nmapVerify the IP address of your computer on the subnet it is connected:
hostname -ISample output:
192.168.0.129 192.168.122.1 10.19.0.12 100.85.0.1 fdeb:446c:912d:8da:: fdeb:446c:912d:8da::What you need is the first IP from the output
192.168.0.129(on this example), and from that, assuming the computer is connected with standard configuration, the gateway IP address will be192.168.0.1.Scan the local subnet, to identify IPs currently in use:
nmap -sn 192.168.0.0/24Sample output:
Starting Nmap 7.80 ( https://nmap.org ) at 2021-06-22 10:01 -03
Nmap scan report for _gateway (192.168.0.1)
Host is up (0.00036s latency).
Nmap scan report for 192.168.0.128
Host is up (0.0053s latency).
Nmap scan report for fd2lm (192.168.0.129)
Host is up (0.000038s latency).
Nmap scan report for 192.168.0.145
Host is up (0.0053s latency).
Nmap done: 256 IP addresses (4 hosts up) scanned in 3.26 seconds
Verify what IPs are in use and must not be reassigned. On the example, it is the IPs ending in
.128,.129, and.145.
Configure, Build and Add the Overlay File Into the Bootable Partition
It could be a bit tricky to manually set up the directories/files/scripts needed to build the overlay file from scratch (and it could be another blog post) so, to simplify, we are going to use a ‘boilerplate’ solution and assign the required configuration on top of it.
Download this repository https://github.com/mesca/alpine_headless.
(This is a crafted solution to simplify the creation of an overlay file that temporarily sets up the network connection and the SSH server for the Alpine’s first boot on the Raspberry Pi.)
Apply the network configurations:
With the repository on your machine, edit the following file on your code editor:
alpine_headless/ovl/etc/network/interfacesReplace the
gatewayaddress with your subnet gateway address (192.168.0.1in this example), and assign a static IP address by replacing theaddresswith an available IP address as previously verified. I will use the ending.125for this example.The file will look similar to this:
auto lo
iface lo inet loopback

auto eth0
#iface eth0 inet dhcp
iface eth0 inet static
    address 192.168.0.125
    netmask 255.255.255.0
    gateway 192.168.0.1

auto wlan0
iface wlan0 inet dhcp
Setup the WiFi connection:
(You may skip this step if the Raspberry Pi will connect via network cable.)
Edit the following file on your code editor:
alpine_headless/ovl/etc/wpa_supplicant/wpa_supplicant.confChange the local WiFi network name (
ssid) and the password (psk), example:network={ ssid="change_me" psk="change_me" }Build the overlay file:
Make sure you are at the repository’s
alpine_headless/folder, and run:./make.shCopy the overlay file to the root of the MicroSD boot partition:
cp localhost.apkovl.tar.gz /run/media/rossijonas/4F85-22E7(Replace the MicroSD mount point. Check again with ‘lsblk’ if needed.)
Double check the MicroSD boot partition, it must contain the Alpine Linux files, the
usercfg.txtfile and thelocalhost.apkovl.tar.gzfile:ls -la /run/media/rossijonas/4F85-22E7Output should look similar to this:
total 5548
drwxr-xr-x. 5 rossijonas rossijonas    4096 dez 31  1969 .
drwxr-x---+ 4 root       root            80 jun 22 11:09 ..
drwxr-xr-x. 3 rossijonas rossijonas    4096 jun 15 11:35 apks
drwxr-xr-x. 2 rossijonas rossijonas    4096 jun 15 11:35 boot
drwxr-xr-x. 2 rossijonas rossijonas   20480 jun 15 11:35 overlays
-rw-r--r--. 1 rossijonas rossijonas      25 jun 15 11:35 .alpine-release
-rw-r--r--. 1 rossijonas rossijonas   26894 jun 11 05:10 bcm2710-rpi-2-b.dtb
-rw-r--r--. 1 rossijonas rossijonas   28392 jun 11 05:10 bcm2710-rpi-3-b.dtb
-rw-r--r--. 1 rossijonas rossijonas   29011 jun 11 05:10 bcm2710-rpi-3-b-plus.dtb
-rw-r--r--. 1 rossijonas rossijonas   26890 jun 11 05:10 bcm2710-rpi-cm3.dtb
-rw-r--r--. 1 rossijonas rossijonas   49214 jun 11 05:10 bcm2711-rpi-400.dtb
-rw-r--r--. 1 rossijonas rossijonas   49218 jun 11 05:10 bcm2711-rpi-4-b.dtb
-rw-r--r--. 1 rossijonas rossijonas   49892 jun 11 05:10 bcm2711-rpi-cm4.dtb
-rw-r--r--. 1 rossijonas rossijonas   20120 jun 11 05:10 bcm2837-rpi-3-a-plus.dtb
-rw-r--r--. 1 rossijonas rossijonas   20525 jun 11 05:10 bcm2837-rpi-3-b.dtb
-rw-r--r--. 1 rossijonas rossijonas   20989 jun 11 05:10 bcm2837-rpi-3-b-plus.dtb
-rw-r--r--. 1 rossijonas rossijonas   19852 jun 11 05:10 bcm2837-rpi-cm3-io3.dtb
-rw-r--r--. 1 rossijonas rossijonas   52456 jun 15 06:06 bootcode.bin
-rw-r--r--. 1 rossijonas rossijonas      60 jun 15 11:34 cmdline.txt
-rw-r--r--. 1 rossijonas rossijonas     408 jun 15 11:34 config.txt
-rw-r--r--. 1 rossijonas rossijonas    5448 jun 15 06:06 fixup4.dat
-rw-r--r--. 1 rossijonas rossijonas    7314 jun 15 06:06 fixup.dat
-rw-r--r--. 1 rossijonas rossijonas     927 jun 22 11:10 localhost.apkovl.tar.gz
-rw-r--r--. 1 rossijonas rossijonas 2229120 jun 15 06:06 start4.elf
-rw-r--r--. 1 rossijonas rossijonas 2953312 jun 15 06:06 start.elf
-rw-r--r--. 1 rossijonas rossijonas      11 jun 21 12:11 usercfg.txt
Eject and remove the MicroSD card, it’s finally ready for the first boot!
Headless Installation, Setup & Persistent Storage
Remote Access to the Raspberry Pi
Insert the MicroSD card into the Raspberry Pi, plug the network cable (if needed), and power on.
After a few seconds, run
nmap -sn 192.168.0.0/24again and verify that the Raspberry Pi is connected with the IP address previously defined.Remotely access the Raspberry Pi via SSH as
rootuser with no password:ssh root@192.168.0.125(Remember to replace the IP address from this example.)
If you get an error like this:
@@@@@@@@@@@@@@@@@@@@@@@@@@@@@@@@@@@@@@@@@@@@@@@@@@@@@@@@@@@
@    WARNING: REMOTE HOST IDENTIFICATION HAS CHANGED!     @
@@@@@@@@@@@@@@@@@@@@@@@@@@@@@@@@@@@@@@@@@@@@@@@@@@@@@@@@@@@
IT IS POSSIBLE THAT SOMEONE IS DOING SOMETHING NASTY!
(...)
That means that there was already another system using the static IP assigned for the Raspberry Pi, and there is a fingerprint on your local machine associated with this remote.
If that error happens, edit the file
~/.ssh/known_hostsremoving the line that starts with the IP address assigned to the Raspberry Pi.If the SSH access was successful, you will see a prompt like this:
Welcome to Alpine!

The Alpine Wiki contains a large amount of how-to guides and general
information about administrating Alpine systems.
See <http://wiki.alpinelinux.org/>.

You can setup the system with the command: setup-alpine

You may change this message by editing /etc/motd.

(none):~#
(Notice that the prompt line ending with
#shows that you are logged asrootuser.)
Alpine Linux Initial Setup
Perform Alpine’s initial setup:
setup-alpineYou will be prompted to assign/select:
- Keyboard layout
- Hostname (You may leave empty, use default)
- Network Interface (You may leave empty, use default)
- IP Address (You may leave empty to keep using current IP address assigned)
- Netmask (You may leave empty, use default)
- Gateway (You may leave empty, use default)
- Network Manual Configuration (You may leave empty, use default)
- Gateway (You may leave empty, use default)
- DNS Domain Name (You may leave empty, use default)
- DNS Domain Server (You may leave empty, use default)
- Change Root Password (You must create the
rootpassword) - Timezone
- HTTP/FTP Proxy (You may leave empty)
- NTP client (You may leave empty, use default)
- Repository Mirror (You may leave empty, use default)
- SSH Server (You may leave empty, use default)
- “Enter where to store configurations” (Assign
mmcblk0p1if not selected by default.) - Cache Dir (Assign
/media/mmcblk0p1/cacheif not selected by default.)
Update the system after setup:
apk update && apk upgradeSave all the changes applied by
setup-alpineand the system update:By default, Alpine Linux is installed as Diskless Mode, and any changes might be saved using Alpine Local Backup (lbu).
lbu commit -dAdd basic configuration to the new SSH server installed:
The overlay file created previously won’t run anymore since the system was installed and set up via the
setup-alpinescript. That means the SSH server we accessed on the first boot will not be set anymore.Before the first reboot, the SSH server installed by the
setup-alpinescript must be configured to allow remote access again.Open the following file on the text editor of your choice (
vi/nano):(Alpine Linux uses
vias the default text editor, If you are not comfortable withvi/vim, I recommend you to installnanoto perform this task:apk add nano.)vi /etc/ssh/ssd_configornano /etc/ssh/sshd_configFind the following directives, uncomment and assign the values like the example below, then save and quit the editor:
(...)
Port 22
(...)
PermitRootLogin yes
(...)
PubkeyAuthentication yes
(...)
PasswordAuthentication yes
PermitEmptyPasswords no
(...)
Commit the changes and reboot:
lbu commit -drebootAfter reboot, access the Raspberry Pi as
rootagain:ssh root@192.168.0.125. This time you will be prompted for the root password created.
Set Up the Persistent Storage
Set up the second MicroSD partition to be used as the home directory for the user that will be created and also to serve as persistent storage.
Verify the presence of both partitions with the command:
blkidSample output:
/dev/mmcblk0p2: UUID="8a98a5df-e8a9-4f03-b1f6-6c9ecad2e854" TYPE="ext4"
/dev/mmcblk0p1: UUID="0815-9310" TYPE="vfat"
Create a mount point for the second partition (
mmcblk0p2):mkdir /media/mmcblk0p2Add the mount instruction to
fstab(and mount all again):
echo "/dev/mmcblk0p2 /media/mmcblk0p2 ext4 rw,relatime 0 0" >> /etc/fstab
mount -a
(You may double-check that it is mounted with mount.)
Commit the changes:
lbu commit -d
Create an Admin User
Create the user’s (
user1) home directory on the persistent storage:mkdir -p /media/mmcblk0p2/home/user1Create the admin user (
user1):adduser -h /media/mmcblk0p2/home/user1 user1Add user to
wheelgroup:adduser user1 wheelInstall
sudo:apk add sudoAllow users from
wheelgroup full access to the system, by applyingsudocommand and providing the user password:visudoThis command will open the
/etc/sudoersfile on thevitext editor. You must find and uncomment the following line:# %wheel ALL=(ALL) ALLInstructions for who never used the
vi/vimeditor:- Navigate down to find the line we want, by using the arrow keys.
- When the line is found, place the cursor on top of the
#character and typexkey. - Type
:xand press Enter to save and leave.
Commit the changes again:
lbu commit -dUpdate the SSH server configuration to block
rootlogin attempts:(From now on the system will be accessed remotely by the admin user created
user1.)Open the following file on the text editor of your choice (
vi/nano):vi /etc/ssh/ssd_configornano /etc/ssh/sshd_configFind the following directive, assign the value, save and quit the editor:
(...)
PermitRootLogin no
(...)
Commit and reboot:
lbu commit -drebootAfter reboot, you are able to connect via SSH as the admin user created:
ssh user1@192.168.0.125Issue the command
whoamito verify the current user name and the commandpwdto verify the home directory.Sample Output:
Welcome to Alpine!

The Alpine Wiki contains a large amount of how-to guides and general
information about administrating Alpine systems.
See <http://wiki.alpinelinux.org/>.

You can setup the system with the command: setup-alpine

You may change this message by editing /etc/motd.

rpi4b-s1:/$ whoami
user1
rpi4b-s1:/$ pwd
/media/mmcblk0p2/home/user1
Verify that there’s the
$sign at the end of the user command prompt, which means you are logged as a regular user.
Post Installation
The Alpine installation is ready and the Raspberry Pi is good to go! In this section, I will recommend some tweaks you may find useful.
Before the tweaks I would like to reinforce the storage strategy in place:
Any changes to the system including configuration and packages installations must be saved manually using Alpine Local Backup (lbu commit -d), otherwise, it won’t survive a system reboot.
Any user files and user configurations stored under user’s home directory will normally persist a system reboot, as well as any other files stored at the second partition, mounted on /media/mmcblk0p2.
Recommended Tweaks
Install
manpages.manis your best friend and Alpine Linux doesn’t provide it by default:sudo apk add mandoc man-pages mandoc-apropos less less-docEnable
edgerepositories to be able to install a variety of packages.Open the
/etc/apk/repositorieson the text editor:sudo vi /etc/apk/repositoriesUncomment the entries for
communityandmainedgerepositories:/media/mmcblk0p1/apks http://dl-cdn.alpinelinux.org/alpine/v3.14/main #http://dl-cdn.alpinelinux.org/alpine/v3.14/community http://dl-cdn.alpinelinux.org/alpine/edge/main http://dl-cdn.alpinelinux.org/alpine/edge/community #http://dl-cdn.alpinelinux.org/alpine/edge/testingSave and quit the text editor.
Install
lm-sensorsto quick check the Raspberry Pi CPU temperature in a human-readable form:sudo apk add lm-sensorsCheck CPU temperature with the command:
sensors.Commit the post-installation changes:
lbu commit -d.Finally, extra step, show off!
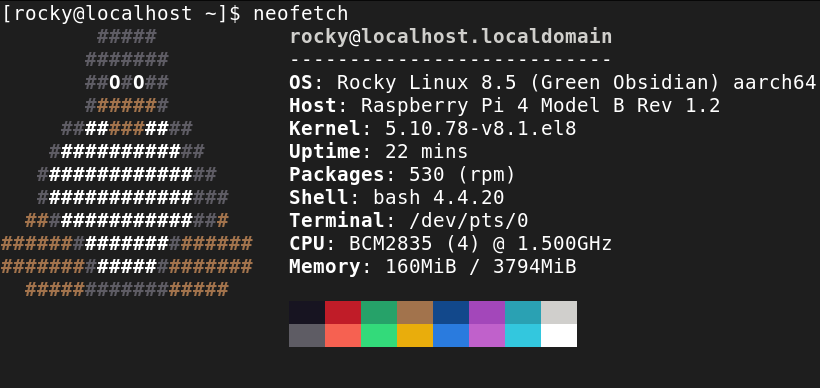
- Install
neofetch:sudo apk add neofetch. - Run
neofetchcommand! It will print the system information on the terminal, just like the header image from this post. - Print or take a picture of the screen.
- Tweet the picture saying: “Thanks @rossijonas”
- Install
Useful links & references:
- Alpine Linux Wiki
- Raspberry Pi Documentation
- “Mastering Vim Quickly” Book (and screencasts) by Jovica Ilic. In this guide you might noticed that
vi/vimare very common tools on the Linux ecosystem. If you would like to gain or improve Vim skills very fast, that is the book I recommend. Make sure you subscribe to the newsletter to get free Vim tips and book excerpts on your email.
(👆 This is an affiliate link. If you got any value from this post and are also interested in buying the MVQ book/screencasts, please consider visiting the affiliate link and you’ll be gifting me a coffee ☕ or a beer 🍺.)
Footnotes:
- Follow me on Twitter to get more posts like this and other quick tips in your feed.
- If you have any doubts or tips about this article, I’d appreciate knowing and discussing it via email.
- Do you have any other Linux tips? Would you like to publish that in this blog? Please send an email to all drops.
- As English is not my native language, I apologize for the errors. Corrections are welcome.
- Contact: contact [@] alldrops [.] info.